
Replacing the Maintenance Cartridge
In case of cautions or errors concerning the maintenance cartridge, an error message will appear on the LCD to inform you of the error. Take appropriate action as prompted by the message.
![]() Important
Important
-
If a message is displayed indicating that the maintenance cartridge is nearly full, replace the maintenance cartridge as soon as possible. If the maintenance cartridge becomes full, an error message is displayed and the printer stops working until the cartridge is replaced with a new one.
-
Do not touch the terminal (A) or opening (B) of the maintenance cartridge.

![]() Note
Note
-
Use a maintenance cartridge with the model number below.
Maintenance Cartridge MC-G04
-
Prepare a new maintenance cartridge.
Remove the maintenance cartridge and the attached plastic bag from the package.
-
Remove the coin screw from the maintenance cover (C).

-
Remove the maintenance cover.
Put your finger on the hole of the maintenance cover and remove it.

-
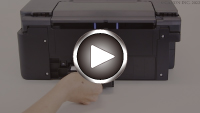
Pull out the maintenance cartridge until it stops.

-
Lift the maintenance cartridge a little and pull it out.

 Important
-
Do not drop the removed maintenance cartridge as ink may spill.
Do not place the removed maintenance cartridge on a desk or other surface, as there may be ink on the bottom of the cartridge.
-
To prevent ink from leaking, do not tilt the removed maintenance cartridge or turn it upside down.

-
Put the used one immediately into the plastic bag that came with the new maintenance cartridge and seal the bag by tying the opening tightly to prevent the ink from leaking.

-
Do not put your hands inside the printer, as ink may adhere to your hands.
-
-
Insert the new maintenance cartridge straight until it stops.

-
Attach the maintenance cover.
Align the tab on the back of the maintenance cover with the hole on the printer and close it.

-
Secure with the coin screw.

